Part II of this instructional will help explain the process for setting up a DNS server along with configuring the Active Directory forest we just created in part I.
The AD Forest is the location where all information and configuration regarding the network domains, users, computers and group policies are stored. The DNS server is the method used to allow the computers on the network talk to one another and understand who they are talking to. It does this by translating an IP to a name, or a name to an IP. To see this in action you can simply open up the CMD and ping google.com. This will translate the domain name using its DNS server to an IP address allowing us to ping using Internet Control Message Protocol (ICMP). Well with somewhat of a basic introduction to the topic lets get started.
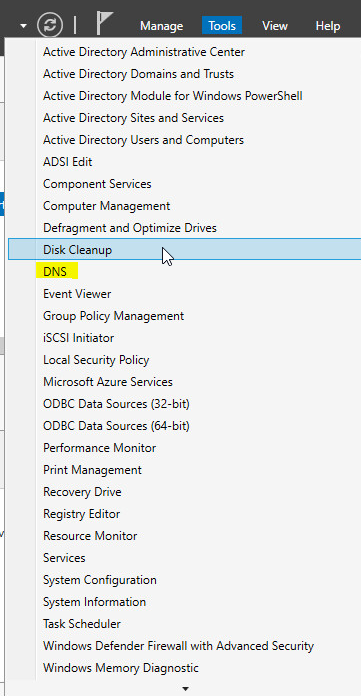
Most of the tools will be found along the toolbar at the top of the Server Manager. If you open up the tools menu you will see many options. Today we are focused on DNS.
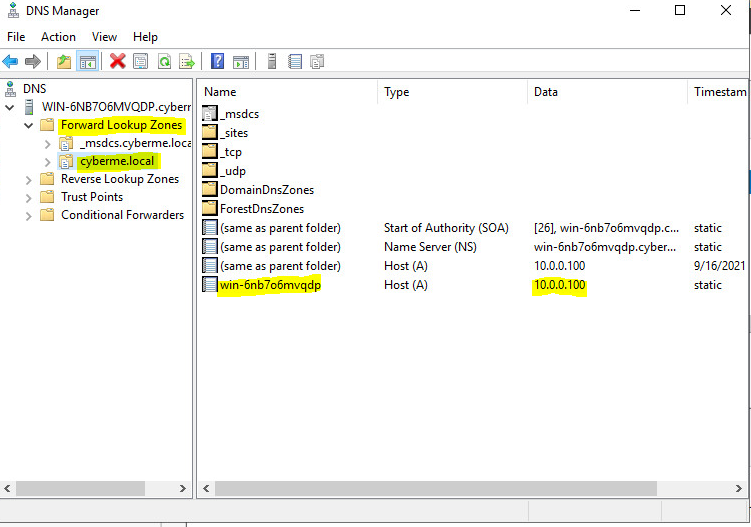
After opening up DNS, the DNS Manager will open. This is where we will edit our DNS server. As explained in Part I, the Forward Lookup Zone allows an IP to be translated to a fully qualified domain name (FQDN). This should automatically be configured upon installing the server as shown in Part I.
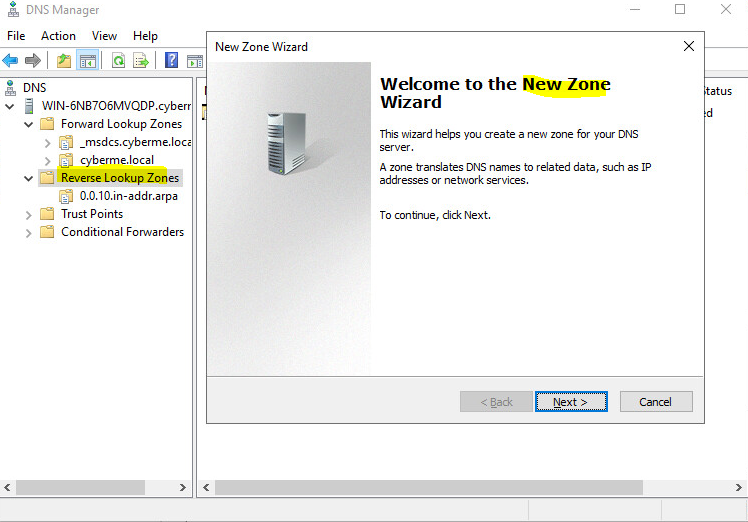
After verifying the Forward Lookup Zone is setup correctly we then want to create a Reverse Lookup Zone. Instead of an IP translating to the FQDN we will translate FQDN to an IP. Right click Reverse Lookup Zone and click “New Zone”.
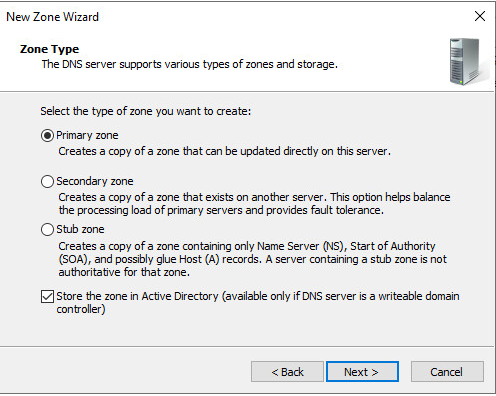
For this lab we are looking to create a Primary Zone.
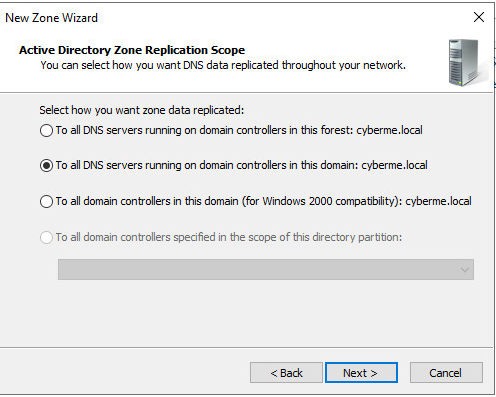
Leave it default and replicate to all DNS servers on DC within this domain.
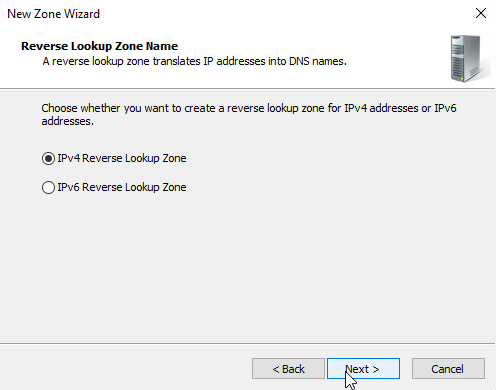
Select IPv4
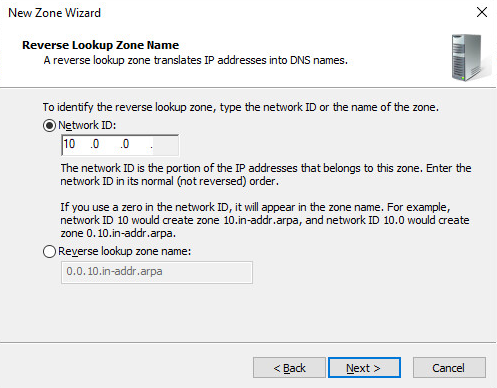
Under “Network ID:” you will enter the first three octets. So for my lab environment with a subnet mask of 255.255.255.xxx I set it to 10.0.0. The last octet will be determined by the device itself depending on if static or DHCP.
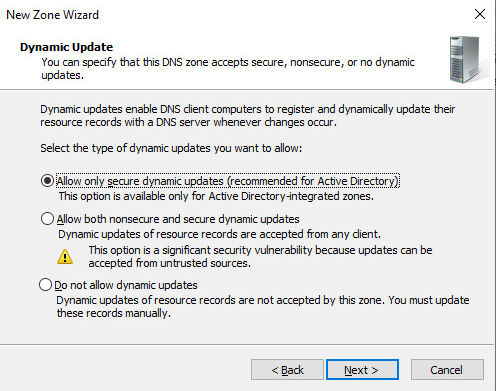
Leave this option selected.
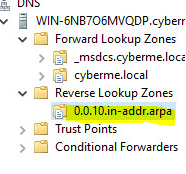
Great now the lookup zone is created. Next considering we are using the reverse lookup we must setup a pointer (PTR) record. As you can see in the picture above for the Forward Zone a “A” record will be used.
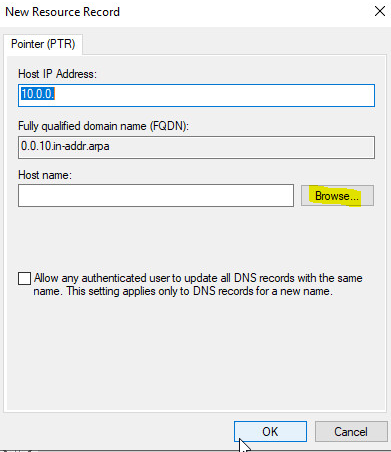
You can right click the newly created zone or right click inside the newly created zone and click “New Pointer”. On this screen you will want to select “Browse”.
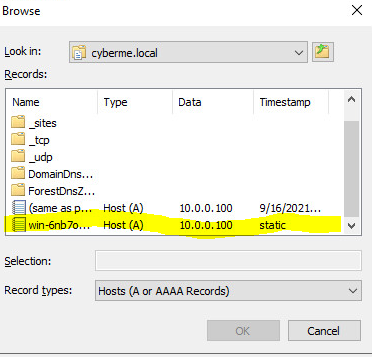
You will then want to select the name of the DC you just promoted.
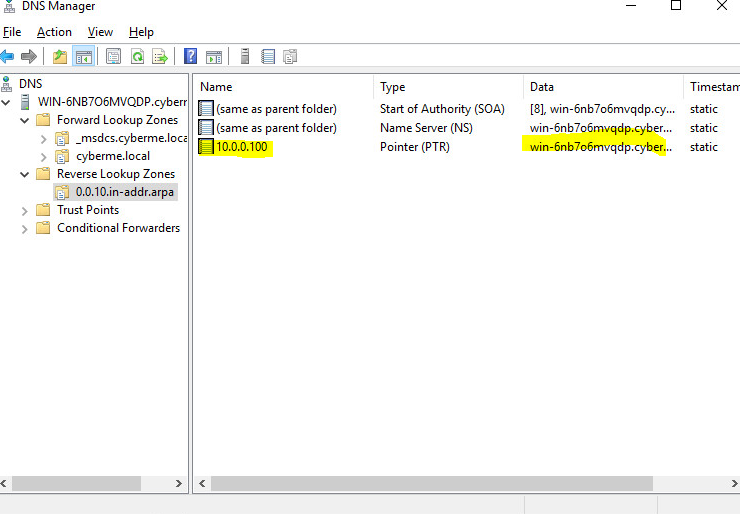
Once that is complete you will then see a new PTR record under the Reverse Lookup Zone. To verify this worked we will use a tool called nslookup. This can be done in CMD or you can just right click the PC in the DNS manager at the very top and click “Launch nslookup”.
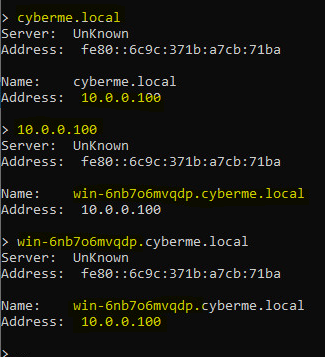
If all is setup correctly you should be able to type in the IP or FQDN and have a valid response. You may also have to flush DNS using ipconfig /flushdns in CMD.
I decided to end it here. Part III will be used to explain how to join a PC to the Domain along with adding a user. The local login information will no longer be used to login. Instead credentials will be pulled from the AD DS.
When I first learned this process I was intimidated. Nearly a year later I was still able to create this lab without any help from Google. It is fairly straight forward. Obviously this can get more complex depending on the environment but for a lab this is a good start. It is free and you can learn a lot of services/technologies used in the industry today. Never Stop Learning!
Also figured I would post some useful links to get started below. I should have posted in Part I but oh well here it is.
Downloads:
Windows 10 Enterprise: https://www.microsoft.com/en-us/evalcenter/evaluate-windows-10-enterprise
NOTE: Not all editions of Windows can join a Domain. That is why I used Enterprise edition.
Windows Server 2019: https://www.microsoft.com/en-us/evalcenter/evaluate-windows-server-2019