I recently had just finished my first certification with the Azure platform (AZ-900) and wanted to jump into some personal projects before moving on to the next (AZ-104). For several months I have been fairly interested in scripting/programming and have heard about Ansible along with a few other solutions to automate practically anything within a networked environment. I am a huge advocate for saving time. Time is limited, with automating repetitive tasks we can use the time elsewhere. Not only can we save time but we can also ensure that the result is always the same.
Purpose
The purpose of this lab is to cover the basics with Ansible. We will cover the process on how to set up the Ansible server, write/push the .yml configuration file to install some basic applications and also setup configurations of the firewall needed for our new machine.
Lab material
- Virtual Machine to install Ansible (walkthrough will use Ubuntu)
- Virtual Machine to manage and push configurations to
- SSH Key pair which I will cover how this can be grabbed from GitHub after generating
Steps
Install Ansible
sudo apt-get install ansibleThe command above works in Ubuntu, but depending on OS or Linux distribution you may have to refer to the documentation.
Create SSH key-pair and upload into GIT
As one of the prerequisites, we are going to create a RSA key-pair and upload into GitHub. We can then share this public key to any of our machines and allow us to execute the various playbooks we create in the future.
NOTE: Always be mindful of what keys you are sharing and where. Never share private key with anyone for any reason. Unless you are doing something similar to what I am doing today and spinning up this VM and keys for one instance and deleting. Even then you still want to be careful of what you post.

Running the above command with -t option will allow us to select the type RSA. We will then be prompted with a few more questions.
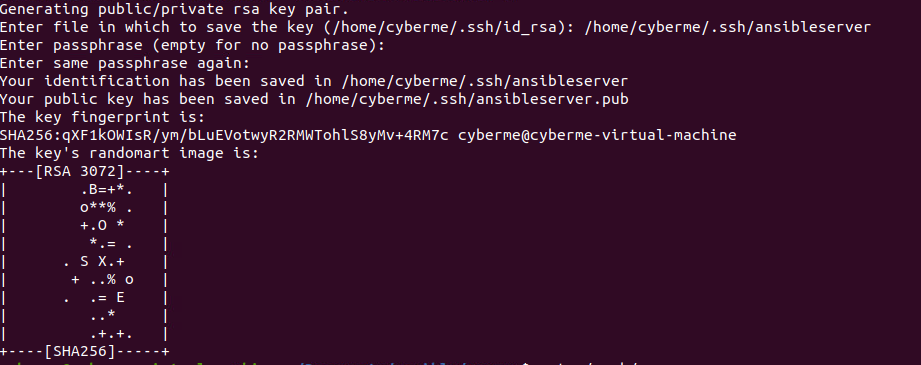
The first question will be path/filename. You can leave this blank and it will default to the names within parenthesis. I like to be more descriptive, so I changed my key to “ansibleserver”.
The next question talks about a passphrase. For this lab I left this blank, but it is another way to secure the pair even further and is highly recommended. Lastly is the fingerprint, which is just a hashed signature of original. This would help us in the future to determine if something had changed if necessary.

We can now see the SSH key has been created and stored in .ssh directory. For existing machines you can copy and paste into the machines ./ssh/authorized_keys file. For any new machines, more specifically Ubuntu machines, we can use GitHub. GitHub will push the keys upon installation.
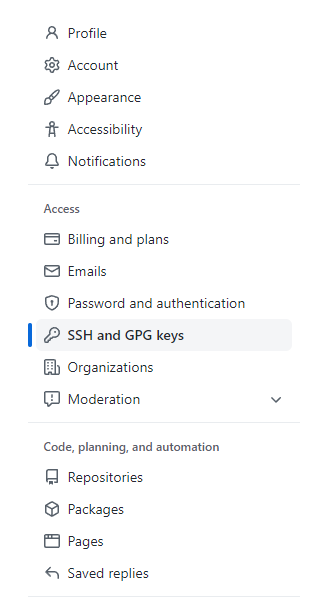
Afterr logging into your GitHub, you will want to get to “SSH and GPG keys” which you can find in the settings in top right corner.
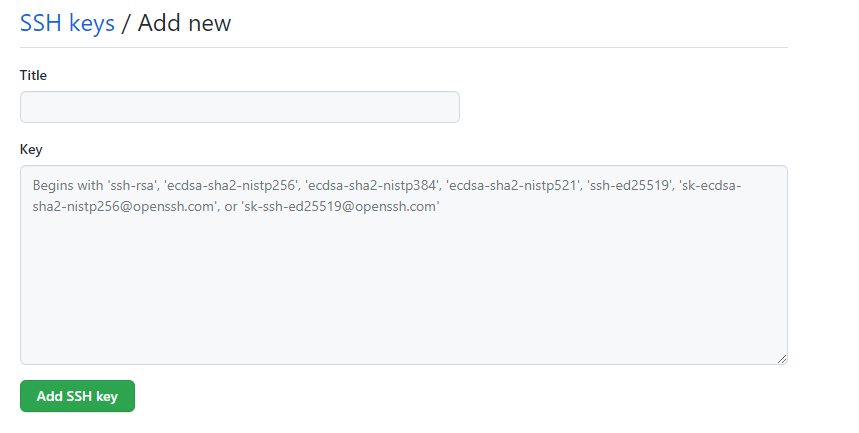
Then all we have to do is name the key to whatever we desire and copy/paste the public key here.
Setting up Ansible hosts/configuration files
Ansible does not have a specific directory to work in. Instead you can make your own file structure. What I do is create a ansible directory to contain everything. Inside of this directory I then create a directory for the specific purpose. For example for this lab I used new-vm. So in the future maybe we can place any ansible files for new machines in this directory.
Once we have our directory set up we will want to create a hosts file and also create another directory for the various playbooks we will create later on.

The hosts file will contain the IP address and maybe some variables depending on the situation.

For example as you see here the IP address 192.168.1.18 is going to be assigned to our new VM. If the username on this new machine is not the same as the ansible server then you will want to specify that here as well. The variables are defined in dictionary format with a key:value. A good reference for the various variables used inside of a host file can be found here or here.
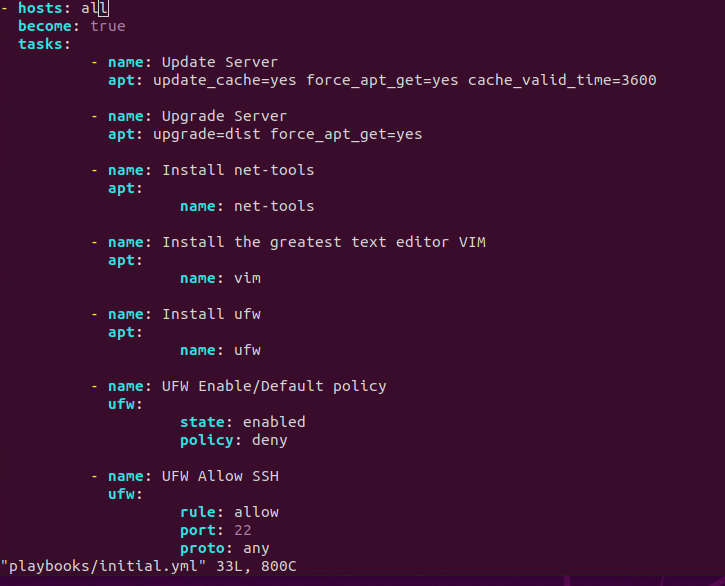
Next we will need to create a playbook with a .yml extension. Obviously within Linux we do not need the extensions to define the file but it is good practice so we know what we are working with. The file will need to be in the YAML format which is just another markup language and very easily read as seen above.
This is example is very basic. From what I seen (and I plan to do overtime) these can get intense. Starting from the top down
- hosts: all – This will allow the execution to be against all addresses in the hosts file we just created.
- become: true – This is not always necessary, but since we have some commands using sudo it is. With this option set to true we are allowing the execution to be escalated to perform these actions. In the command we use to execute the playbook we will use -K option to provide us with a password prompt each time this is run.
- tasks: self explanatory, will contain all of the various tasks that we want to execute
- name: This is used for us to understand the results of execution. Allowing us to see what was changed or what remained the same.
- apt: this is just one of many modules provided by Ansible. Most likely their is a module for some task you would like to automate. The reference for all of the modules compatible with Ansible is found here.
Install new machine
This can be a virtual machine or any other machine you have laying around the house. For lab purposes it is probably easier to spin up a VM and play around. I am not going to cover how to install the Ubuntu distribution instead I will just highlight three things that are relevant to todays lab.
- VM IP-Address
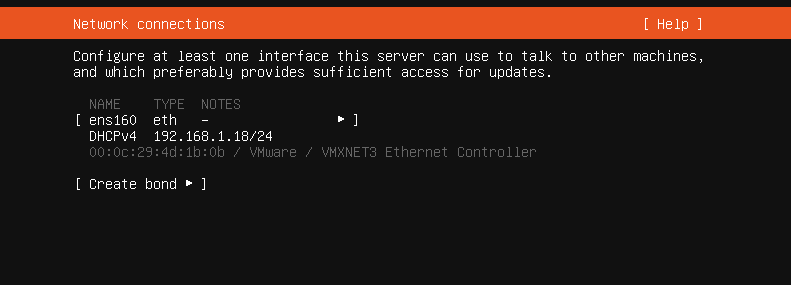
During the installation we can set our static IP or we can use DHCP. What is important here is that we take note of the IP address allowing us to put it in our hosts file.
2. Grabbing SSH from GitHub
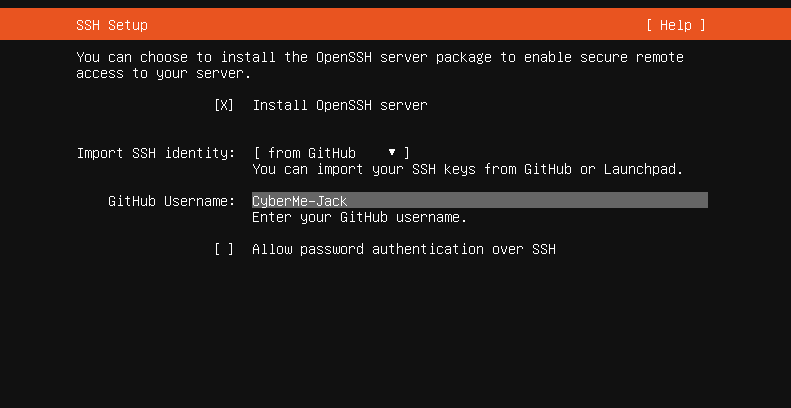
During the setup, the prompt will ask if you would like to install OpenSSH server. Select yes. We also then want to import SSH identity from GitHub. Lastly we need to enter our username. Obviously do not use mine as that will not help you.
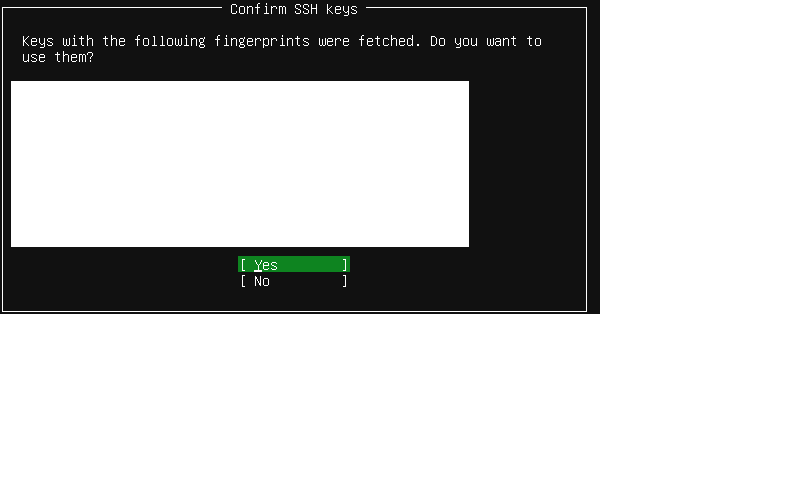
The next screen will then show you which SSH keys it had found.
Execute Playbook
After installing the new machine and presented with the terminal, it may be best to verify you are able to communicate with one another. You can ping the machine from the server or even try to SSH into the server from the terminal. This will save you the headache from trying to figure out if the configuration files are funky or if the SSH is not working as intended. You can also verify the keys are saved inside of the authorized_keys file which we pulled from GitHub.
After confirming you can communicate with the machine, all we need to do is run the following command.

The -i option will allow you to select inventory or also known as the hosts file. We then need to specify the playbook we want to execute. Followed by the option -K, which I mentioned earlier.

After executing the command, a password prompt will ask for BECOME password. The become password is really asking for the root password of the machine you are connecting to. After typing in the correct password the playbook will execute.
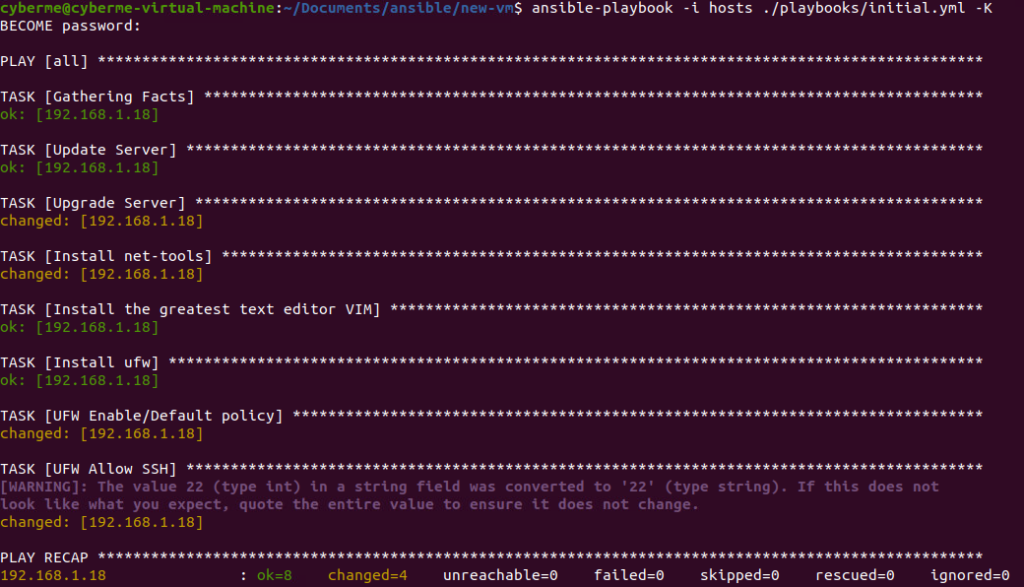
Each play in the playbook, with the names we used will display weather it had changed something or if it was ok (not changed).
The cool part about using ansible is that not only is it agentless but you can run this any number of times and it will only make the necessary changes if the conditions are not met.
Conclusion
Long story short, Ansible is awesome! As I said, I am a huge advocate for saving time. Why do the same thing twice, especially over multiple machines. Create some plays, execute the playbook and be on with it. The references I provided throughout the lab are also very helpful. I suggest taking a look at all of the modules and see if you can use any in your lab or production environment. I saw quite a few I would like to mess around with in the future. That is it for today’s lab, as always, Never Stop Learning.
