This is my first post back on the blog after a recent move. I plan to make a more updated post to cover plans for 2023 but in the mean time I wanted to document a weekend project.
Purpose:
The purpose of this project is to get into the basics of what a DevOps engineer may run into. To do this I decided I wanted to host a website on my Raspberry PI. This website is nothing more then a heading. The cool part is the automation. If we push any updates to our repository we want those changes replicated or pushed down to our web server for everyone to see (everyone being myself). The automation is where I think I find a lot of this interesting. Developing scripts to make the life of others easier. This is nothing but it is the start to what is to come.
What do we need?
- Ubuntu instance to host apache web server
- GitHub account
- Router changes (Port forwarding)
Steps:
1) Setup Ubuntu instance with Apache web server
- Install Apache

- Remove default index.html (not necessary but we will be pushing our own from GitHub)

- Create a new directory. This directory will store the html files which will then be committed to your GitHub repo.
- Inside of this new directory create an index.html file and put a basic heading just so it has something to display later on.

2) Create GitHub repo and push index.html
- Login to GitHub and create a new repository. Be sure to name it as the same folder you created on Linux instance.

- Now that we have a repo on GitHub. Lets go ahead and push this index.html file.
- To do this we can follow the steps provided by GitHub after creating a new repo.

- In order to push over https you will need to generate a Personal Access Token. (Settings/Developer Settings)

- This Token that you generate must have permissions for ‘Repo’. Once generated you will push to the branch by doing the following

- After pushing, you can verify the file has been committed in your GitHub repository

3) Create workflow using GitHub Actions
At this point all we need to do is create an action on GitHub to push the files to our Raspberry Pi. More specifically we want it to push to the /var/www/html directory. This action will only occur once a push to the main branch occurs.
- To do this we will head over to our Ubuntu instance and create a directory. Inside of this directory we will implement the action using .yaml

- deploy.yml

The deploy.yml file is fairly easy to read. It will execute (on) push, in other words once we commit new code to the main branch. It will spin up ubuntu-latest. This is because it will use SCP within an ubuntu container between an established SSH session. How does the SSH session authenticate? The secrets defined under env:. Lastly towards the bottom you will notice the source (current directory) target (apache web server) and strip_components (only the files being copied).
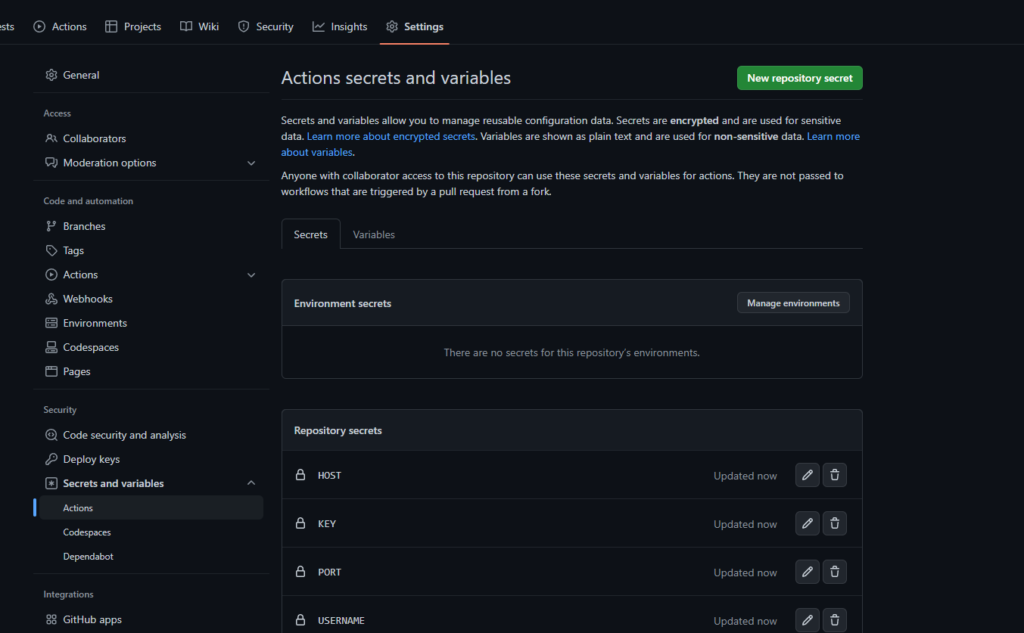
- Secrets can be found here. Ensure you input the correct hostname(Public IP if following lab), username(of ubuntu instance), port(SSH, default 22) and private key(Follow instructions below) otherwise this will not work and you will get errors.
- SSH key pair tutorial link

Push new code, and let the magic happen
Before we can see this all take place you must ensure the ubuntu VM is exposed to the WAN. Otherwise if it is only able to communicate on the LAN, GitHub has no way of establishing the SSH session to perform the copy. To do this you will need to forward port 22 on your router. Once forwarded, you will take your public IP as the host secret and not your private IP.
Note: Once you are done with this lab make sure you disable the port forwarding.
Now that we can reach the web server using our public IP, lets head back over to our ubuntu instance. We will need make some changes to the index.html code. Make any change you want this way we can commit it to GitHub and allow the action to take place. Once the changes have been made you can commit the code by doing the following..
git add *
git status
git commit -m "Updated index.html"
git push https://ghp_jf938ep3TMCui7FiGvaYk3XITJfJx3DRThX@github.com/cyberme-jack/webtest
After the commit we can then verify the status of action..

We can also now see our website has been updated

Conclusion
I am excited to be back. As I am getting settled in, I am slowly getting back into documenting my journey in tech. I enjoy the idea of touching both the operational side and also the development side. I also realize that I love scripting. I love automating tasks and I love learning new things.
I hope whomever does read this blog finds it useful. This is just the basics but stick around and we may get into it more and more as time goes on.
As always, Never Stop Learning!